Do you struggle to format your content in Books within your Moodle or Totara Learn site? You may find that you are copying your existing content from your word-processed documents into the editor, only to find its formatting looks wrong or your images are missing from the page once your book has been saved and viewed. We're here to show you why this may happen, and what you can do to bring back that fantastic content for your Moodle or Totara Learn site.
So, why is my content not formatting correctly?
Modern word processors do not just store the words and images, they also store data that controls how Text and Images are formatted and displayed on the page. This means that if you copy content directly from the word processor into the book editor window, you will also be bringing with it most of the hidden formatting control information and this information is not always compatible. This particularly applies to images, often resulting in broken image links.
|
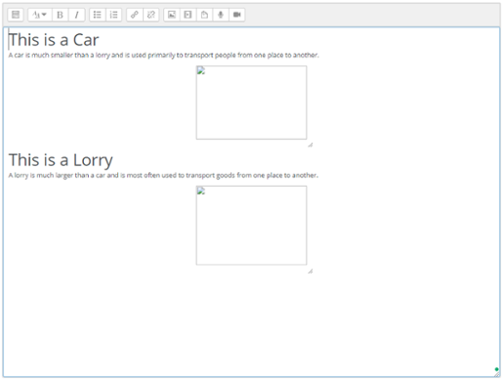
The above image is copied from a Word Processor document |
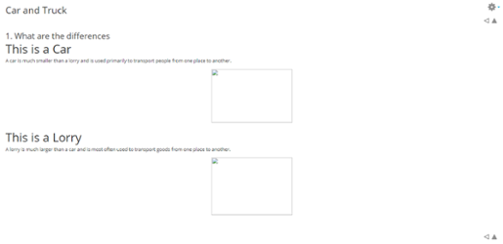
The above image is the result when pasted into the Book Editor |
|
The below HTML code shows what actually gets pasted into the Book Editor: <h1>This is a Car</h1> |
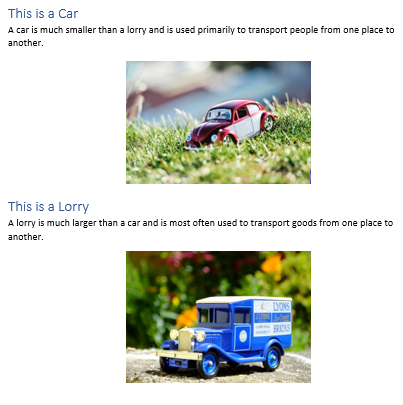
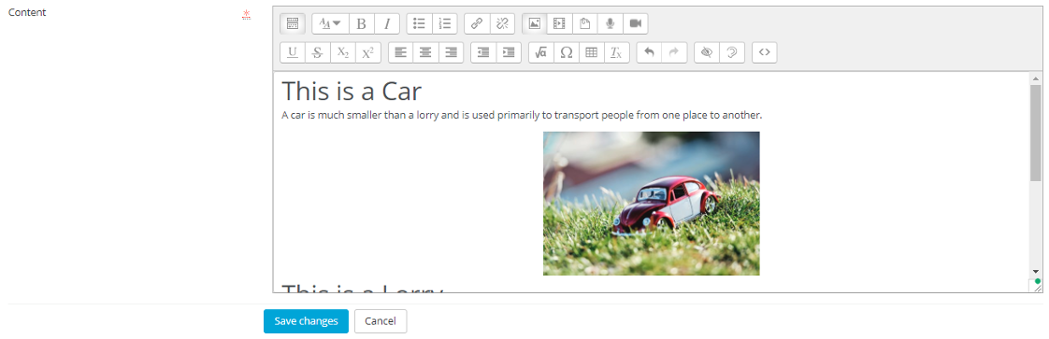
This image shows how the page will be displayed once saved |
How do I fix this?
For text:
In order to get clean text that displays properly, we would recommend copying text from your existing word-processed document and then pasting it into a text editor such as 'Notepad', then reselecting the text from Notepad, copying it again from there and paste it into your book editor window. This will remove the hidden formatting, leaving only your desired text, which you can then format within the book editor windows as you wish.
For Images:
Do not copy and paste images into the editor window, even if it appears to display properly initially, it will often result in broken file links and missing images when you later view the new page you have created. Instead use the Image control and its controls to upload and format your images.

The image upload control button is highlighted above. Click the area in your text that you would like to insert an image and select the Image Button.
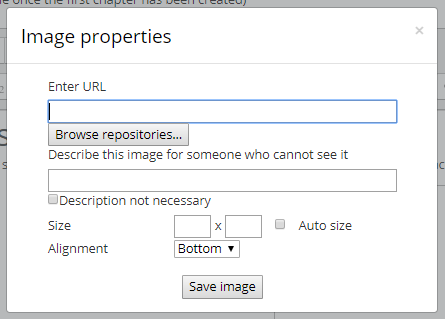
The ‘Image properties’ control will enable you to Upload, Link and Format your required images.
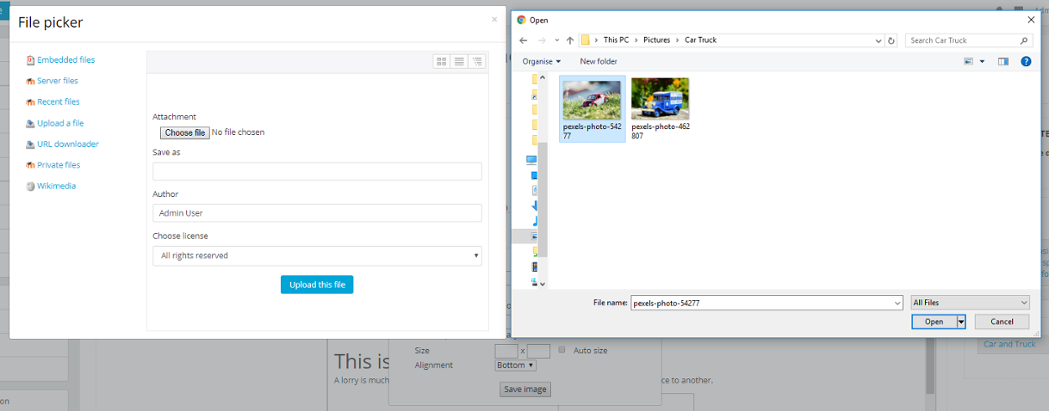
Clicking on the ‘Upload a File’ option and then selecting ‘Choose File’ opens the file selector dialogue window which allows you to navigate your file system and find the file you wish to upload.
Highlight the image you wish to upload and select the 'Open' button. Then in the ‘File Picker’ window click the ‘Upload this file’ button. This will upload the file to your site’s storage where it can be properly linked to the Book.
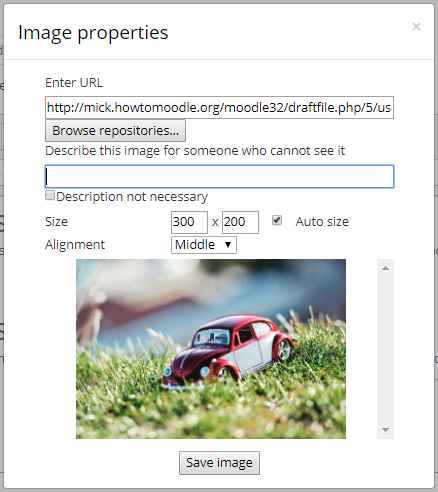
In the ‘Image properties’ window you can then:
- add a description if desired (or select the ‘Description not necessary’ option);
- set the screen position for the image;
- set its display size if you do not want it to remain Automatic.
Once done, click the ‘Save image’ button.
You will need to repeat this process for any media content you wish to use in your book.
If you wish to change the settings for the uploaded image, simply double click on the image in the Books editor window and this will reopen the ‘Image Properties’ control.
This method of copying, pasting and formatting text and especially uploading and displaying images can be used anywhere that the ATTO editor is used within your LMS to better enable you to control over what is displayed and how it is presented.
Images taken from https://images.pexels.co,

Explore HubkenCore – our unique SaaS LMS offering
Ready to see how our new LMS bundled solution is revolutionising how you purchase an e-learning solution?